Preparation, preparation, preparation...
Please Note:
Below is a guide to installing single sized tiles only - if you are installing a pattern, due to the sizes of the tiles used in these patterns, regulated grout lines cannot be guaranteed and therefore the laying by eye rather than using spacers is recommended.
Taking Delivery
Unpacking & Mixing Slate Tiles
Follow the steps below & you will achieve a better looking floor for your efforts.
Upon delivery of your new slate tiles, I recommend that all tiles are taken out of their packaging/boxes and stacked vertically against a wall.
If you have chosen tiles that are heavy in variation then I suggest that they are sorted in to there appropriate colour/mix variation, you may end up with 5 or 6 different piles but this is good, it is better to sort the colours now for your Slate Flooring Installation rather than to just lay them without sorting & have a floor that has not been blended very well, this can be very disappointing to see after completion & to be honest it doesn't take very long to do.
Once you are ready to begin your Slate Flooring Installation, I suggest that you lay your tiles according to the selections you have & blend the tiles well, try to mix the tiles in evenly as you go, making sure that when you come to the last few tiles in each stack, you have an equal number left according to how many was in each stack to begin with.
I suggest that you do a dry run to familiarize yourself with the overall colour variation & to get a feel for the thickness & spacing of each tile, time spent here will save you from rushing when you start to apply your tiles with the adhesive, any mistakes can easily be rectified at this stage, as once adhesive is mixed you will only have so long to use it.
A Tip For You
Another way of making your Slate Flooring Installation easier would be to grade your tiles by thickness, this can easily be done by the eye & I would suggest that once this is done that you start to lay your tiles with the thickest first, this will create a much flatter floor with no raised edges from tile to tile on completion of you slate flooring installation.
Do not worry about dust or dirt on the surface of your slate tiles as you are laying them, this can be removed/cleaned after installation on to your adhesive.
Preparation
Removing Old Flooring
You may have to begin by removing any old floor tiles to reveal the substrate beneath it, this would be the perfect situation for most floors prior to your slate flooring installation. If you have to remove an old floor prior to your slate tile installation then you must ensure that the underlayment is solid, not crumbling or deteriorating in any way, if the subfloor looks in a bad way then I suggest you seek the advice of a professional builder before laying a single tile.
Once your old floor has been removed, check that the floor's surface is level, dry & free of grease, oils & dirt.
Tile To Existing Flooring
If however you decide to lay on top of an existing tiled floor then you will have to make sure that it is solid, clean & that a bonding agent is applied prior to fixing, it is also advised to use a flexible adhesive & grout to account for any future movement which may occur. You may also have to resize any existing doors to account for the additional raise in the height of the floor.
The Subfloor
Concrete
When installing on to a new concrete base you must allow 1 week drying time for every 1 inch of concrete. Most new concrete bases are to rough to allow for thin set beds of adhesive, most new build floors are finished to a smooth finish so thin setting will not be a problem.
Sand & Cement Screed
A fresh screed can shrink during drying which can create cracks, this can cause tiles to split if the screed has not been given enough drying time prior to slate flooring installation. Screeds can be applied unbonded to a concrete subfloor & it is advisable to lay a polythene damp proof membrane under a standard 50mm screed which in turn will require 1 week for every 25mm of screed depth.
Use an Acrylic Bonding & Priming Agent for maximum adhesion to your subfloor whether it is an old or new concrete screed.
Timber Floors
When tiling on top of existing timber floors, i.e. Tongue & Groove boards, it is best practice to use 15mm WBP (water boil proof) Marine Plywood screwed down at 200 – 300mm intervals, a more solid method would be to cross lay 9mm WBP Marine Plywood on a horizontal direction screwed down at every 300mm intervals & then overlay a second layer of 9mm WBP Marine Plywood on a vertical direction screwed down again at 300mm intervals, this method is recommended for floors that tend to have more flex within the overall floor. It is also advisable to leave a small gap between each sheet used to allow for expansion & also to leave a small gap around the perimeter.
For areas that are prone to damp & moisture such as bathrooms & shower areas (especially shower wall enclosures), it is advised to use a tile backer board such as “No More Ply”, this is dimensionally stable & water resistant & will not shrink or crack.
You must use a Flexible Adhesive & Grout when laying on to a wooden surface.
Unleveled Floors
Most old floors will have small bumps & dips, this can be overcome by applying more adhesive to the back of the tile at the time of you slate flooring installation, for more extreme & very uneven floors you should use a self leveling compound, this will bring these areas when installing slate, back up to a workable level & stop tiles from sagging or dipping. This can occur if to much adhesive is applied to the back of the tile when trying to bring it up to the correct level.
Under Floor Heating Systems
Many people are now realizing the added benefits that under floor heating can bring to a new floor with its gentle warmth underfoot & low running costs when laid in conjunction with laying slate tiles. Brazilian Slate can be used with every type of under floor heating, it holds heat extremely well for reduced electrical running costs as long as insulation boards are utilized to reflect the heat from the subfloor back to the surface.
Installing Your Natural Slate Floor
Prime The Floor
Now you have removed all debris & you have prepared the floor to install slate flooring, the first job is to prime your floor, apply an Acrylic Bonding Agent with a small sponge roller to Wood, Asphalt, Concrete, walls, porous plaster or plasterboard.
Find The Centre
Once the bonding agent has dried the next step is to find the centre focal point of the room, to do this find the centre of each wall & join opposite axis A&B, C&D by snapping a chalk line from opposing sides.
Where the 2 lines meet in the centre of the room or centre focal point, this is the starting point at which to begin your slate flooring installation.
Laying The First Tile
Begin by mixing half a bag of adhesive (around 10kg) with either a drill & paddle mixer which is much easier than mixing adhesive with a mixing stick.
PLEASE NOTE
Once mixed, NEVER add water to adhesive once it starts to set or go hard, it can lose its adhesion or not set hard if more water is added.
Next is to lay a template around the cross axis of your centre point, apply adhesive to the area to be tiled using your notched trowel, spreading adhesive away from the centre point while avoiding your chalk lines. It is important that you take your time at this stage as the rest of the floor will follow this centre focal point, then apply a skim coat to the back of the first tile, the skim coat on the back of the tile ensures that the tile height will match up, some natural slates have slight variation in thickness & this skim coat acts as a cushion to level the tiles easily, press the tile firmly in to place & do the same for the following tiles around the centre focal point.
Use your small trowel to score the adhesive around the edges of the placed tiles, this “cutting back” prevents adhesive from oozing up between the joints.
PLEASE NOTE
Brazilian Slate Tiles are precision cut so you can easily get away with a 4-5mm grout joint for much tighter grout lines, this gives a modern, contemporary feel to your floor & looks much neater.
Laying The Rest
Now you have your centre point tiles, you can begin your slate flooring installation by following one of your chalk lines to the perimeter of the room, if you are not fitting a square tile such as 300x300 but instead you have 600x300 the same applies, follow your straight line. Once you have your focal point tiles in position & you have your starting point for the whole floor.
Take your time & lay the rest of the tiles in the centre of the room, leave the perimeter tiles until last as this way you can cut every tile to size when the centre tiles are dry, otherwise you will rush every perimeter tile & it will look shoddy. Cutting the border tiles one by one last, & taking your time allows you to lay them neatly & you will also cut them to a better size. This can be time consuming so it is best left till last.
Once the centre tiles are dry it is time to cut all your perimeter tiles, as described in Tools For The Job above, you can purchase a small table wet saw which includes a diamond blade & these will now cut through most stones up to 15mm in thickness. These diamond cutters are the best option as they use water to eliminate 90% of the dust that is generated while cutting the tiles.
Another way to cut your slate tiles is with a 6inch angle grinder that is fitted with a diamond blade, the dust created from this will more than likely overwhelm you so you must ensure you have a dust mask on & wear eye protection as small shards of slate can seriously damage your eyes. If using an angle grinder, the best way to cut the tiles is to lay the tile on the a wooden surface, turn on your grinder & where you have marked the tile for cutting, gently scour out the line to be cut with the grinder without cutting through it on this first attempt, this passing phase will act as a guideline. Once the line is scoured you can then pass over the line to be cut again & go right through the tile from one end to the other.
I recommend having a practice on a tile so you get the hang of it, it is much easier if you pass over first & make a small groove along your line to be cut & then on the second pass go straight through.
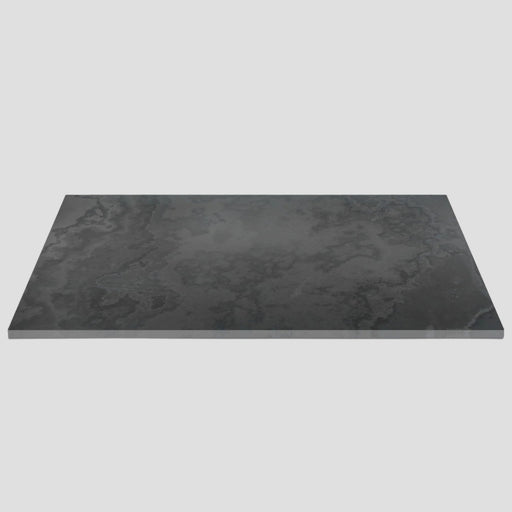
Stunning Slate Paving Slabs from Mrs Stone Store
A Tip For You
You will find that when using a wet cutter any mark you have put on your tile with a pencil will disappear as soon as water hits it, the best way to be able to follow your cutting line would be to use a wax crayon, this will not wear off & is easier to follow & see when cutting.
Always use a dust mask & goggles when cutting tiles.
Tools for the job
The tools required for your slate flooring installation, they are the basic items you will need for your project.
For prepping
Tools for the job
The tools required for your slate flooring installation, they are the basic items you will need for your project.
For Prepping

Kango Demolition Bolster Hammer 10kg - 110v
(available to hire from your local hire shop - to remove any old flooring tiles the easy way)

Lump Hammer

Bolster Chisel
(to remove an old flooring tiles the hard way)

Scraper
(to remove any old bitty materials)

Small sponge painters roller
(to apply bonding agent)
For Mixing

Mixing bucket for adhesive and grout
if not using ready-mix)

Paddle Mixer and Drill
(the easy way to mix adhesive)

Mixing Stick
(the hard way to mix adhesives)
For Cutting

Small diamond blade wet cutter
(available at all DIY stores for no more than £30)

6 inch hand grinder with diamond blade

Dust Mask

Safety Goggles
For Fixing

6mm notched trowel
(for spreading adhesive)

Small trowel

Chalk Line
(also a tape measure, crayon and pencil)
For Grouting

Rubber Float

Clean bucket

Big sponges
(preferably tiling sponges, not car washing sponges)
For Sealing

Small sponge painters roller
(to apply sealer)


